How to use Finder on your new Mac

Have you ever wanted to take control of your Mac's Finder? Learn how with this guide!
The Finder is your gateway to all of the files, apps, and downloads on your Mac. Everything, from your Dropbox folders to your cool new desktop wallpaper, can be located in the Finder. You also have a lot of control over what the Finder will show you, and how different parts of the Finder will work.
Follow this guide to take control of the Finder and make it work for you.
- How to open a Finder window
- How to use Quick Look
- How to show or hide hard disks, external disks, CDs, and connected servers on your desktop
- How to set a new Finder window's default section
- How to use Tags
- How to create custom Tags
- How to customize the Finder sidebar
How to open a Finder window
There are a few methods for opening windows in the Finder to let you get at your files.
- Click on your desktop (don't select an app or program), then click on File in the Menu bar and choose New Finder Window.
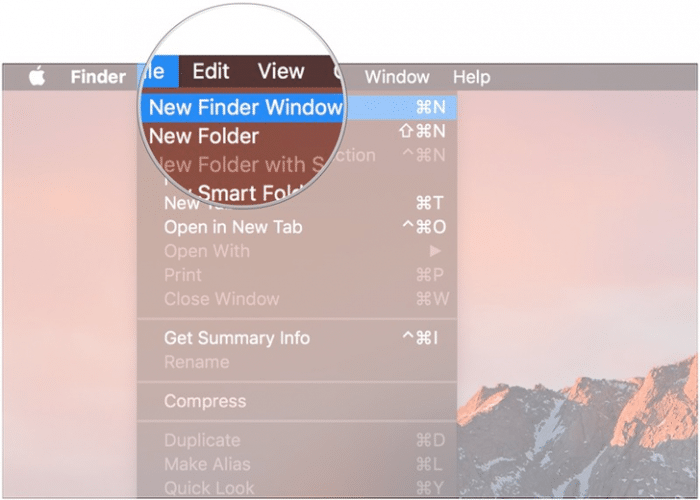
- On your Dock, click on the Finder icon (looks like a smiling face).
![]()
- On your keyboard, hit 'Command-N' while you have the desktop selected.
How to use Quick Look
1. Open a new Finder window.
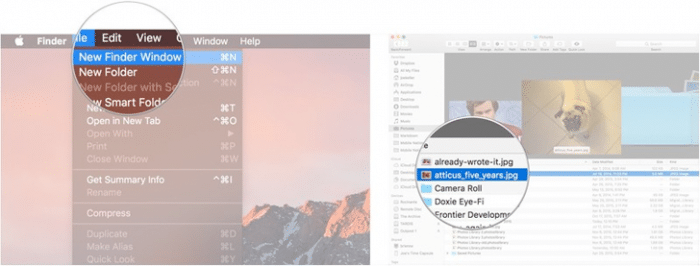
2. Find the file you wish to use Quick Look with and click it once.
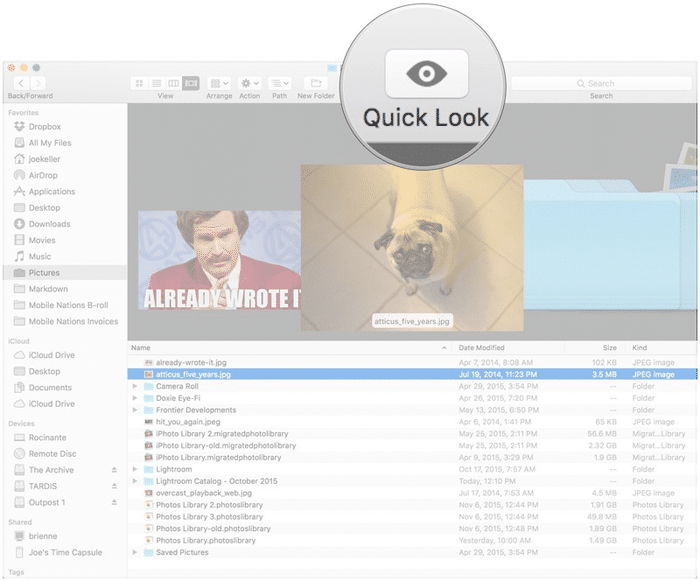
3. Click the Quick Look button on your Finder's toolbarAlternatively, tap the Space bar on your keyboard.
How to show or hide hard disks, external disks, CDs, and connected servers on your desktop
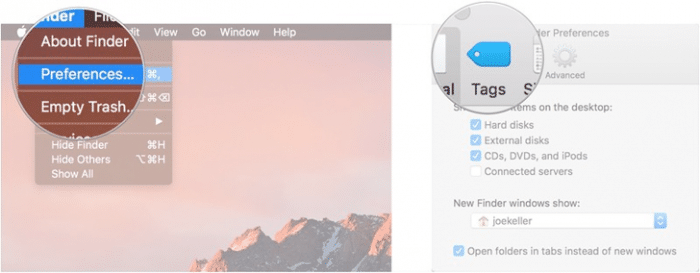
1. In Finder, click on Finder in the Menu bar and select Preferences.
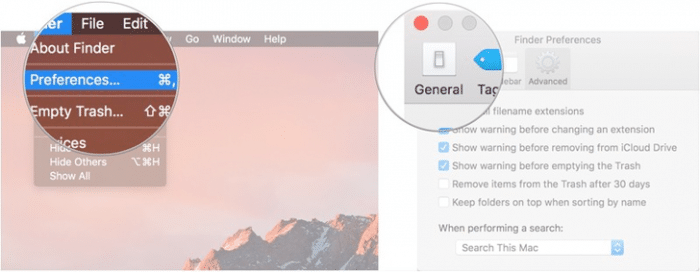
2. Click General.
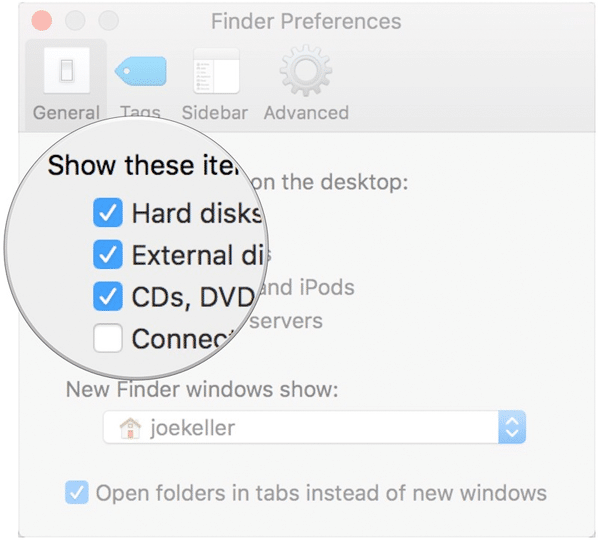
3. Check the boxes for the types of items you want to display on your desktop.
How to set a new Finder window's default section
1. In Finder, click on Finder in the Menu bar and select Preferences.
2. Click General.

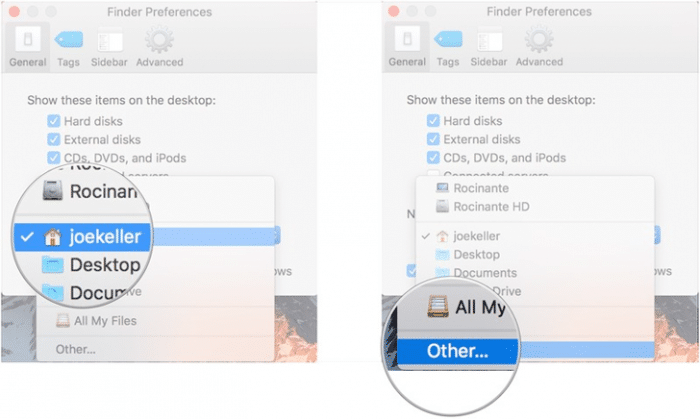
3. In the drop down menu, click on the folder or storage device new Finder windows should show when it opens.
4. If your desired section isn't immediately available, choose Other.
How to use Tags
1. In Finder, click on Finder in the Menu bar and select Preferences.
2. Click Tags.
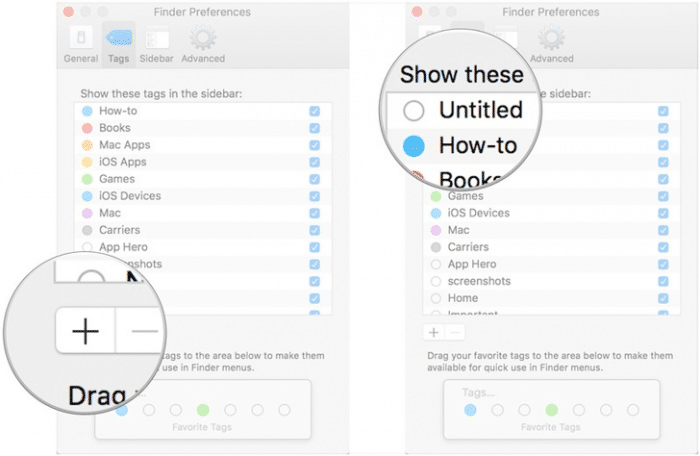
3. Check the boxes next to your tags to select which tags are displayed in your Finder's sidebar.
4. Drag a favorite tag to the bottom of the Tags tab to make it available for quick access in Finder menus.
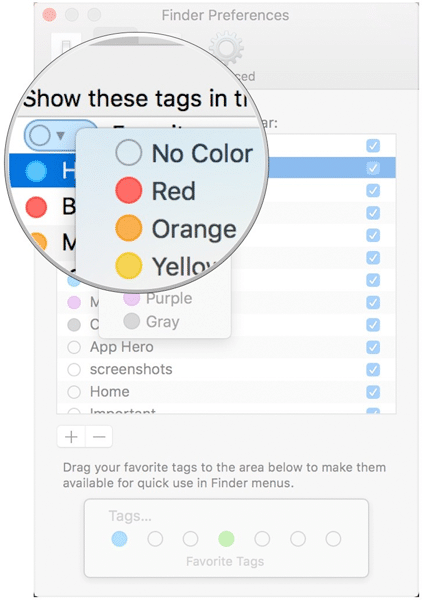
How to create custom Tags
1. In Finder, click on Finder in the Menu bar and select Preferences.
2. Click Tags.

3. Below the list of tags, click the + button.

4. Enter a name for your tag.
5. Click the circle next to your tag to assign it a color.
How to customize the Finder sidebar
1. In Finder, click on Finder in the Menu bar and select Preferences.
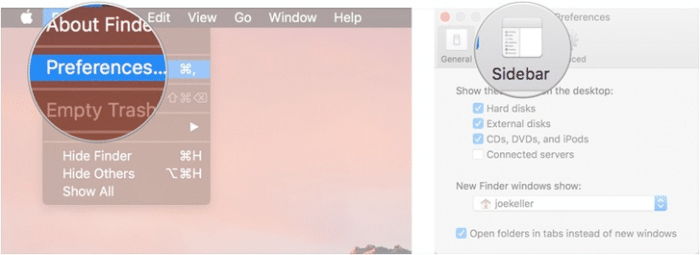
2. Click Sidebar.
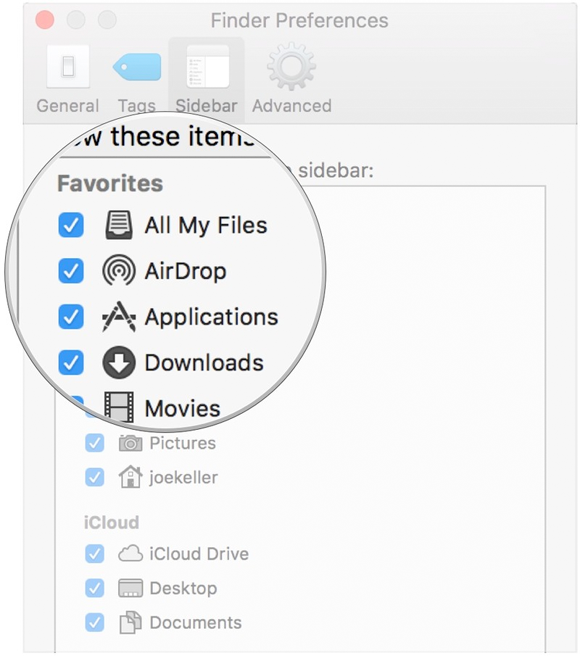
3. Check the boxes next to the items you want to see in your Finder's sidebar.
Any questions?
Do you have any questions about how to use Finder on the Mac? Drop them in the comments and we'll help you out.


